Classic Garlic and Dill Refrigerator Pickles
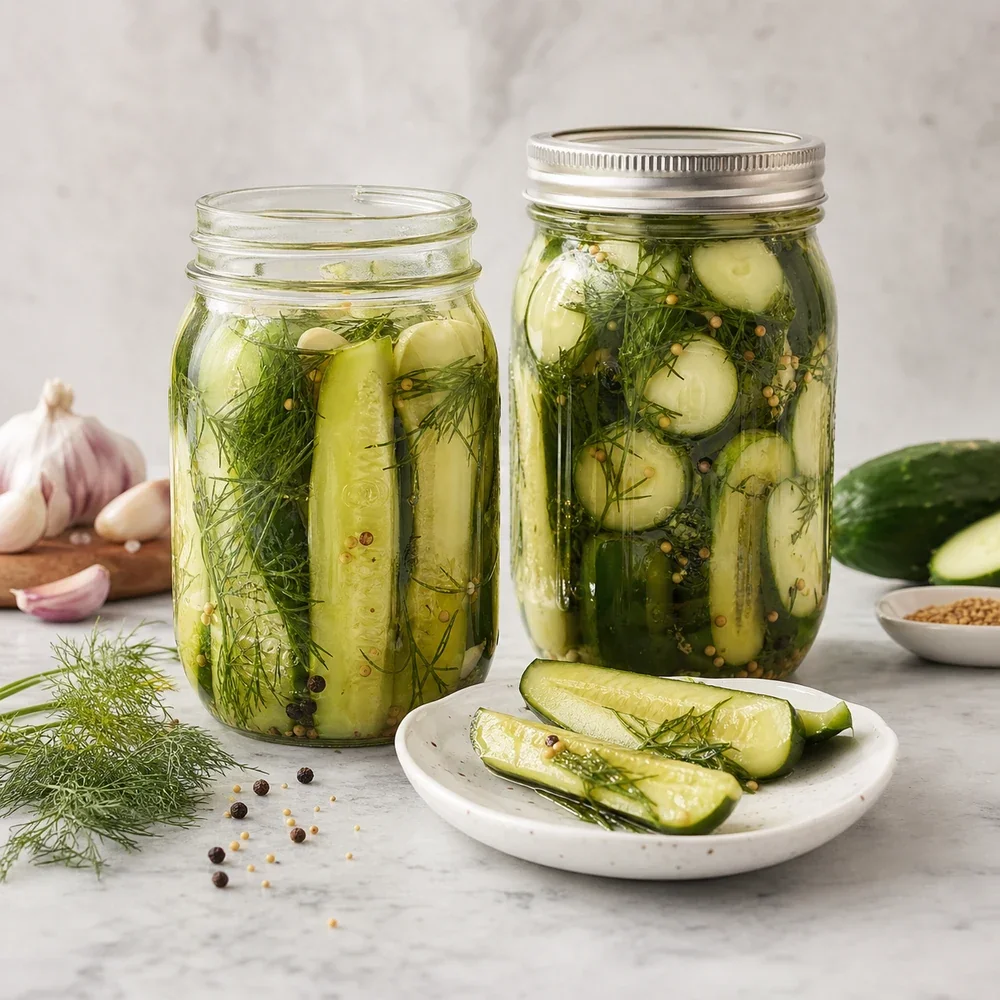

Dill Pickles
Crisp, tangy, and garlicky homemade dill pickles that are ready to eat after just 24 hours in the fridge.
There is something incredibly satisfying about the sharp 'snap' of a perfectly chilled, homemade pickle. These refrigerator dill pickles are a staple in my kitchen because they deliver that classic, punchy deli-style flavor with a fraction of the effort. Unlike traditional canning, there is no need for a massive water bath or special equipment; you just need a few fresh ingredients and a little bit of patience while they brine in the fridge.
What makes this recipe truly stand out is the balance of aromatics. By using fresh dill and plenty of smashed garlic, you create a depth of flavor that store-bought jars simply can't match. Whether you slice them into chips for your backyard burgers, cut them into spears for a deli-style lunch side, or just snack on them straight from the jar, these pickles are guaranteed to be the crunchiest, tangiest treats in your refrigerator.
Nutrition (per serving)
Directions
-
1
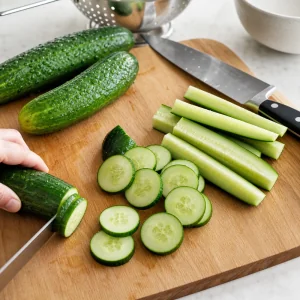
Wash the cucumbers thoroughly and slice them into 1/4-inch rounds or thick spears, depending on your preference.
-
2

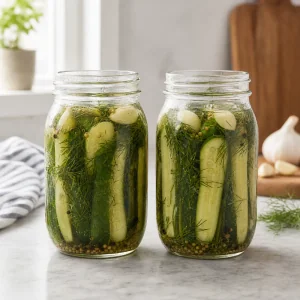
Divide the smashed garlic, fresh dill sprigs, mustard seeds, peppercorns, and optional red pepper flakes between two clean 16-oz glass mason jars.
-
3
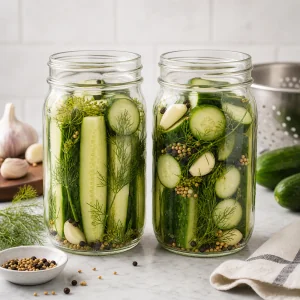
Pack the cucumber slices or spears tightly into the jars, leaving about half an inch of space at the top.
-
4
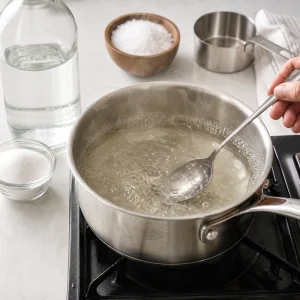
In a small saucepan, combine the water, white vinegar, kosher salt, and sugar. Bring to a simmer over medium-high heat, stirring until the salt and sugar are completely dissolved.
-
5
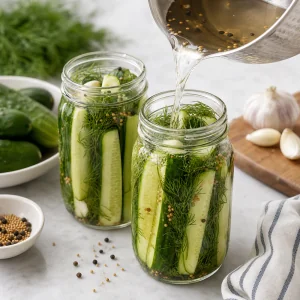
Carefully pour the hot brine over the cucumbers in the jars, ensuring they are completely submerged.
-
6
Let the jars sit at room temperature until they are cool to the touch.
-
7
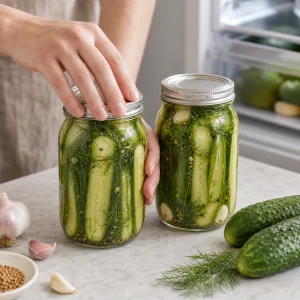
Place the lids on the jars and tighten. Refrigerate for at least 24 hours before eating to allow the flavors to develop.
Ingredients
- Kirby (pickling) cucumbers, sliced into rounds or spears:1 lb
- Water:1 cup
- White vinegar:1 cup
- Kosher salt:2 tbsp
- Sugar:1 tbsp
- Garlic cloves, peeled and smashed:4 pieces
- Fresh dill sprigs:4 pieces
- Mustard seeds:1 tsp
- Whole black peppercorns:1 tsp
- Red pepper flakes (optional for heat):½ tsp
Tips & Notes
- For the crunchiest pickles, look for Kirby cucumbers—they have a thicker skin and firmer flesh than English or salad cucumbers.
- If you have time, soak your sliced cucumbers in ice water for 30 minutes before packing them to ensure maximum crispness.
- These pickles will stay fresh and crunchy in the refrigerator for up to 4 weeks.
- Feel free to experiment with other spices like coriander seeds, celery seeds, or even a few slices of fresh horseradish for an extra kick.