Artisan Gluten-Free Sourdough Bread with Homemade Starter
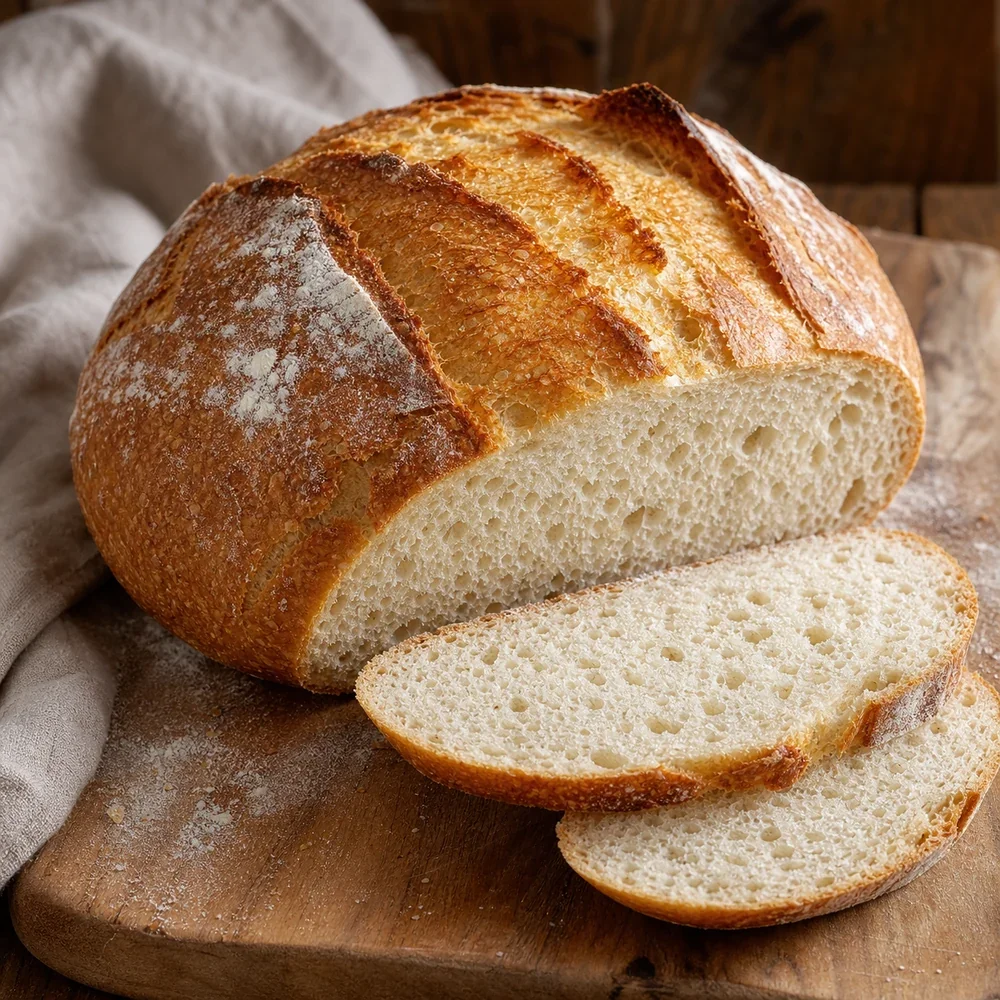

GF Sourdough Bread
A crusty, chewy artisan loaf made with wild yeast. The ultimate gluten-free sourdough experience.
There is something truly magical about the rhythm of sourdough baking, and being gluten-free doesn't mean you have to miss out on that soul-warming experience. This recipe delivers everything you crave in a classic loaf—a shatteringly crisp crust, a soft and airy crumb, and that signature tangy flavor that only a slow fermentation can provide. It's a labor of love that transforms simple, gluten-free ingredients into a centerpiece-worthy loaf that rivals any traditional bakery find.
The key to success here is patience and a vibrant, active starter. Unlike traditional wheat dough, gluten-free sourdough doesn't require intensive kneading; instead, it relies on the structure of psyllium husk and high-quality flour blends to hold the gases produced by the wild yeast. Whether you're a seasoned baker or just starting your fermented journey, this bread will make your kitchen smell like a professional boulangerie and leave you feeling like a true artisan in your own home.
Nutrition (per serving)
Directions
-
1
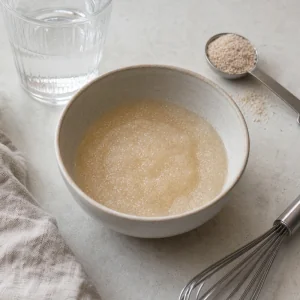
In a small bowl, whisk the psyllium husk powder into the warm water. Let it sit for 5-10 minutes until it forms a thick, gel-like consistency.
-
2

In a large mixing bowl, combine your active sourdough starter, the psyllium gel, honey, and olive oil. Whisk until mostly smooth.
-
3
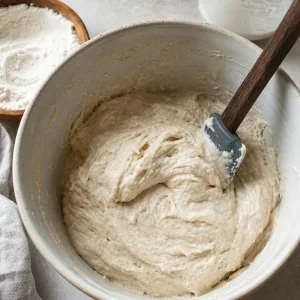
Add the gluten-free flour blend and sea salt to the wet mixture. Mix with a sturdy spatula or a stand mixer fitted with a paddle attachment until a cohesive, sticky dough forms and no dry flour remains.
-
4
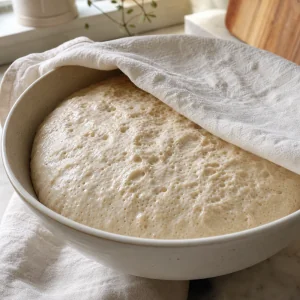
Cover the bowl with a damp cloth or plastic wrap and let it ferment at room temperature for 8 to 12 hours (overnight is best). The dough should grow in volume and look aerated.
-
5
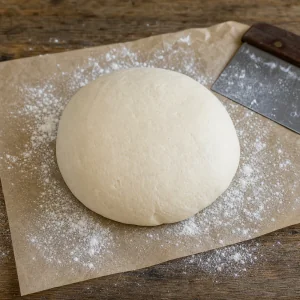
Turn the dough out onto a piece of parchment paper lightly dusted with flour. Gently shape it into a smooth round boule, tucking the edges under.
-
6

Place the dough (on the parchment) into a proofing basket or a medium-sized bowl lined with a floured towel. Cover and let rise in a warm spot for 2 hours.
-
7
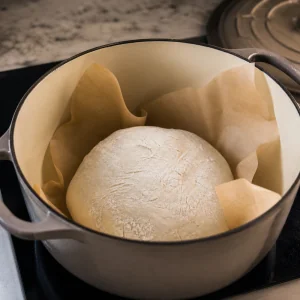
Place a Dutch oven inside your oven and preheat to 450°F. Once hot, carefully lift the dough by the parchment and lower it into the Dutch oven.
-
8

Score the top of the loaf with a sharp blade or knife. Cover with the lid and bake for 30 minutes to trap the steam.
-
9
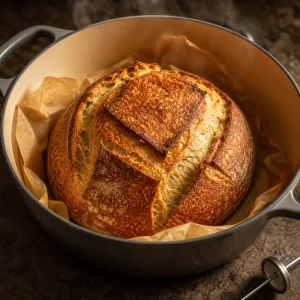
Remove the lid and continue baking for 25-30 minutes until the crust is a deep golden brown and the internal temperature reaches 205-210°F.
-
10
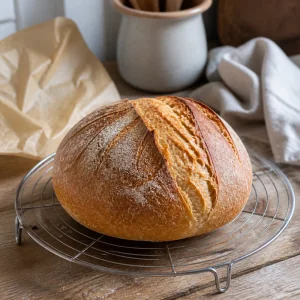
Transfer the loaf to a wire rack. You must let it cool completely (at least 4 hours) before slicing, or the interior will be gummy.
Ingredients
- Active gluten-free sourdough starter (fed and bubbly):1/2 cup
- Warm water (about 90°F):1 1/2 cups
- Psyllium husk powder:2 tbsp
- Gluten-free bread flour blend (with xanthan gum):3 1/2 cups
- Fine sea salt:1 1/2 tsp
- Honey or maple syrup:1 tbsp
- Extra virgin olive oil:1 tbsp
Tips & Notes
- Always use a digital scale if possible; gluten-free flours vary wildly in weight compared to volume.
- If your flour blend doesn't contain xanthan gum, add 1 teaspoon to the dry ingredients.
- The long cooling time is non-negotiable for gluten-free sourdough—the crumb finishes setting as it cools.
- For a more sour flavor, let the shaped loaf proof in the refrigerator for 24 hours instead of 2 hours at room temperature.